
Multiple files OK
Add images using the panel on the left.
They'll appear here ready to compress.
Understanding 80 KB Photo Size Limitations
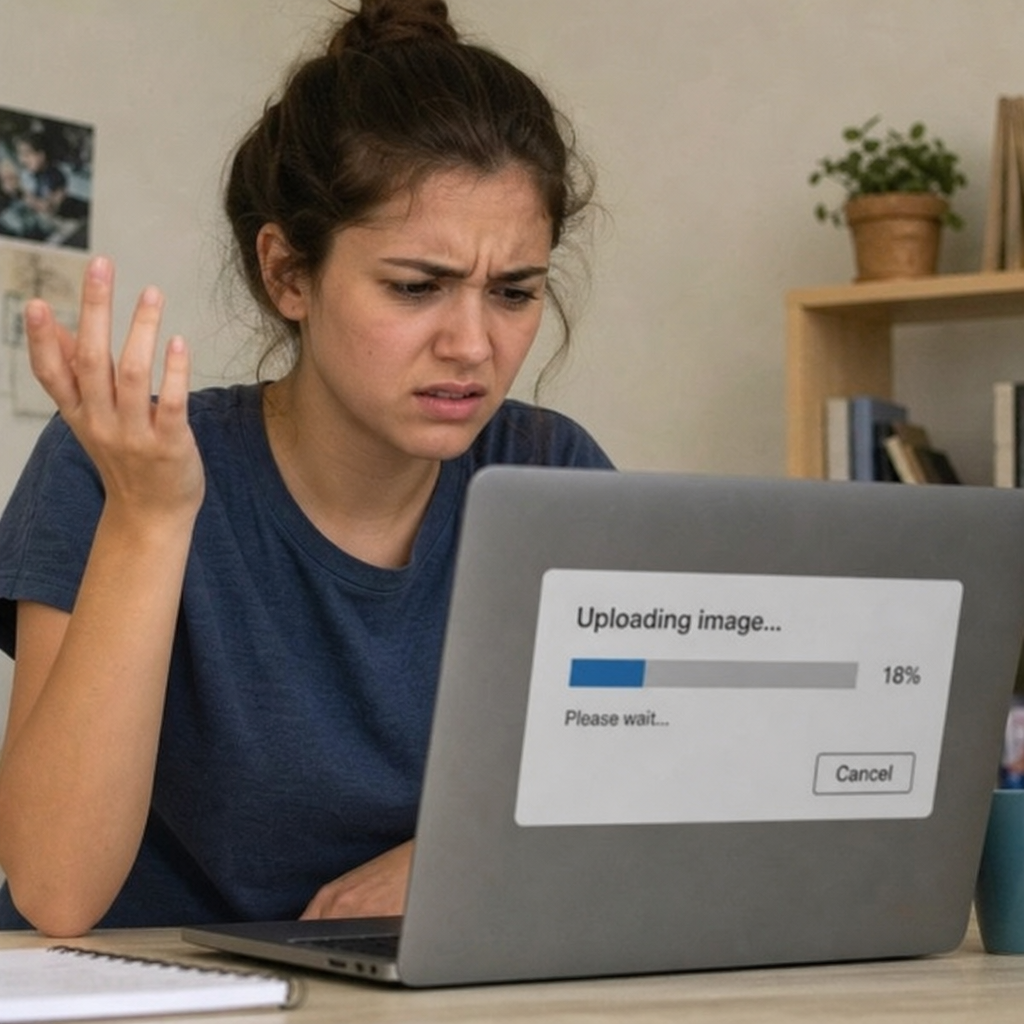
Have you ever spent hours carefully filling out an online application, double-checking every detail, only to be stopped dead in your tracks by a glaring red error message? Usually, it reads something like: “Error: File size too large. Maximum allowed size is 80 KB.” It is a remarkably common and deeply frustrating scenario.
As the world transitions to fully digital paperwork, almost every government portal, university registration site, and job board requires you to upload documents and identification photos. Often, these platforms mandate a strict 80 KB photo size. Whether you are applying for a travel visa or updating your professional credentials, figuring out how to reduce photo kb for application forms is an essential digital survival skill.
In this comprehensive guide, we will explore exactly what this file size limit entails, why it exists, and how you can easily convert mb to KB for photos without turning your face into an unrecognizable, blurry mess.
Why is the 80 KB Photo Size Limit So Common?
Before diving into the technical “how-to,” it helps to understand the “why.” Why are we forced to shrink our beautiful, high-resolution smartphone photos down to a tiny 80 KB file?
The answer lies in server storage and website performance. Government bodies and large educational institutions receive millions of applications every year. If everyone uploaded a 5 MB smartphone photo, server costs would skyrocket, and databases would crash. By enforcing a strict file limit, developers ensure an optimized image resolution for web performance, keeping databases lightweight. Furthermore, smaller files ensure that even users with slow internet connections can load and submit web pages without timing out.
Understanding Formats: JPEG vs PNG
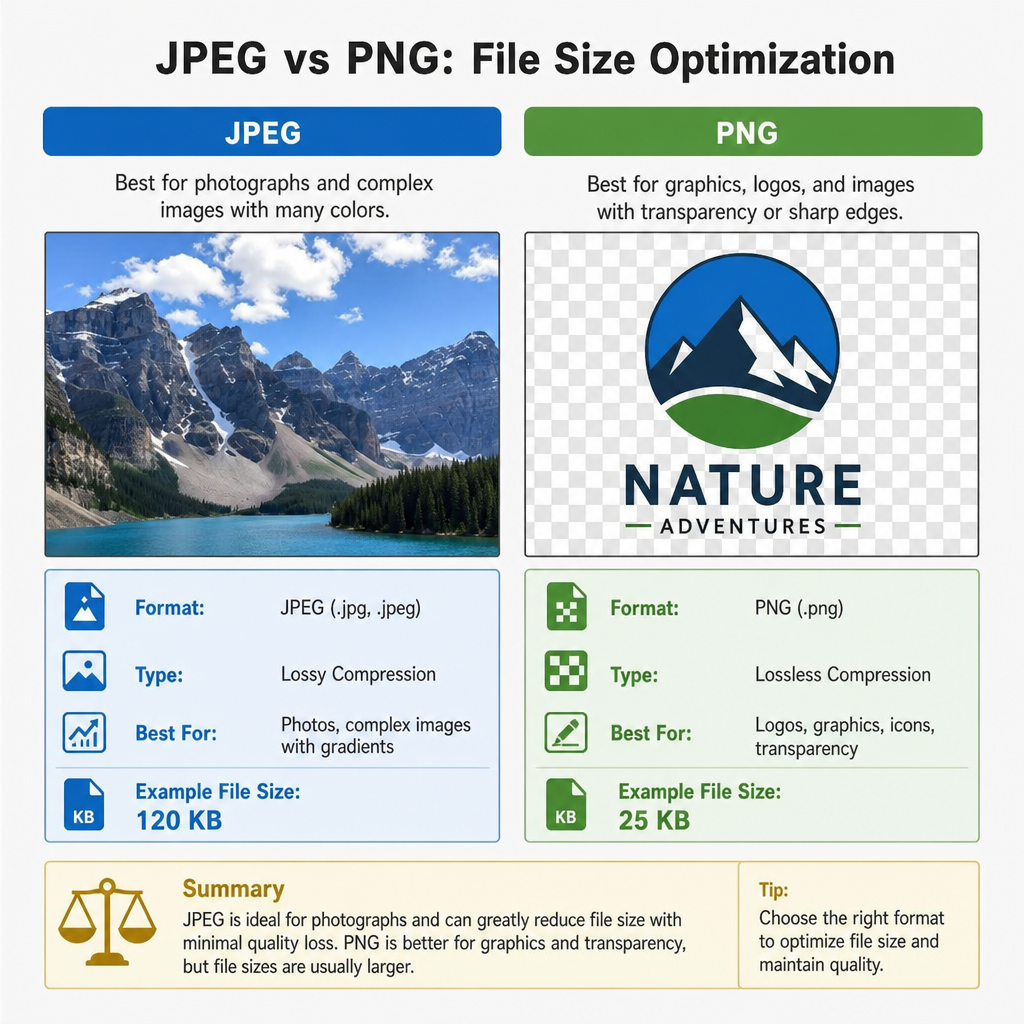
When you are trying to squeeze an image into a tight file constraint, your choice of file format is your most critical decision. In the debate of JPEG vs. PNG for small file size, JPEG almost universally wins.
PNG files are fantastic for images that require transparent backgrounds or crisp graphic design elements (like logos or text). However, PNGs use lossless compression, meaning they retain every single piece of visual data, which makes the file size significantly heavier.
JPEGs, on the other hand, were specifically designed for photographs. They use a “lossy” compression algorithm that gently discards microscopic bits of visual information that the human eye cannot easily detect. Because of this, it is incredibly easy to compress a JPEG to 80kb. In fact, most online forms specifically demand that you convert a photo into an 80 KB JPG to ensure the image meets both format and size requirements simultaneously.
How to Reduce Image File Size Without Losing Quality
The biggest fear people have when shrinking a photo is that they will ruin the image. So, how to reduce image file size without losing quality? Achieving this requires a balanced, three-pronged approach.
1. Adjusting Physical Dimensions
A photo’s file size is intrinsically linked to its physical pixel dimensions. A modern smartphone takes pictures that are often 4000 pixels wide. You do not need an image that large for a tiny profile picture. By learning to adjust image dimensions for upload, you can instantly drop a file from megabytes to kilobytes.
For example, standard passport photos usually only need to be around 600×600 pixels. Similarly, the standard dimensions for digital signatures are typically around 256×64 pixels. Cropping and resizing the physical dimensions is the single fastest way to reduce the image size to 80 KB.
2. Stripping Hidden Data
Did you know your phone saves invisible data inside every photo? This is called EXIF data (or metadata), and it records your GPS location, the camera model, the date, and the exposure settings. All of this text takes up valuable storage space. By using software to remove metadata to reduce file size, you can easily shave off an extra 10 to 20 KB without touching the actual image pixels at all!
3. Smart Compression
While JPEGs are inherently lossy, modern software uses smart algorithms that mimic lossless compression techniques. By analyzing the image and grouping similar colors together efficiently, these algorithms help you maintain image clarity at a low file size.
The Best Tools to Get the Job Done
You do not need an expensive subscription to Adobe Photoshop to resize your pictures. The internet is flooded with highly efficient online image compression tools. If you find yourself asking, “What are the best free image resizers available today?” you should look for web applications that allow you to compress images to specific KB targets.
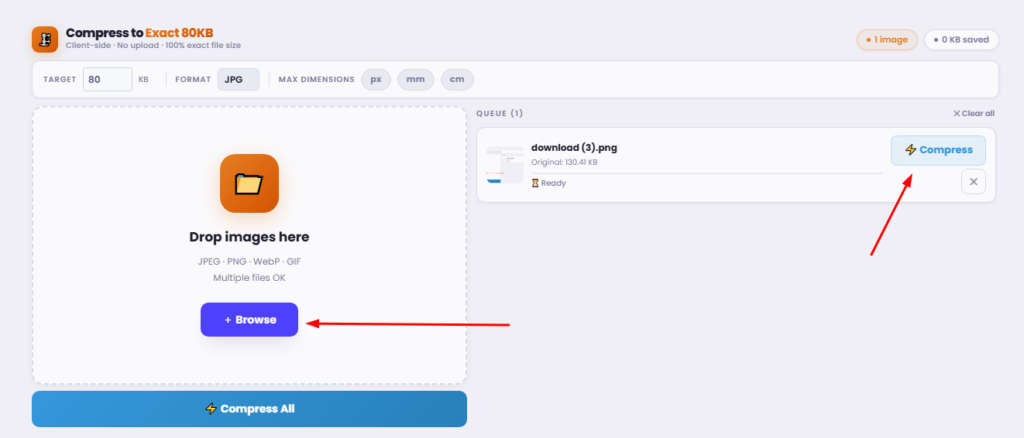
A good 80 KB converter will let you upload your massive file and do all the math for you. You simply type “80” into the target box, and the tool adjusts the compression ratios automatically. Here are a few features to look for in a reliable photo compressor to 80kb:
- Live Previews: The ability to see what the image looks like before downloading.
- Format Flexibility: Built-in capability to act as a JPG converter 80 kb tool if your original file is a PNG, HEIC, or WebP.
- Privacy: Tools that automatically delete your photo from their servers after processing, which is vital when you resize a passport photo online containing your face or personal ID.
Step-by-Step Guide: Compressing Your Image
Ready to tackle the resizing process? Follow these steps to compress an image to 80 KB quickly and efficiently.
- Choose Your Platform: Open your web browser and navigate to a trusted JPEG compressor to 80kb tool.
- Upload the File: Drag and drop your high-resolution photograph onto the web page.
- Crop First (If Necessary): If there is excess background in your photo, crop it out first. This naturally reduces file weight.
- Set the Target Size: Use the tool’s interface to resize the image to 80 KB. If the tool uses a quality slider instead of a target size box, drag the slider down to about 70% and check the estimated output size.
- Force the Format: Ensure you select the option to convert the image to JPG 80kb. This ensures you won’t be rejected for using the wrong file extension.
- Process and Download: Click the compress button. You have now completed a successful photo conversion into 80 kb, and your file is ready to be uploaded to your application.
Troubleshooting: Hitting the Exact Target
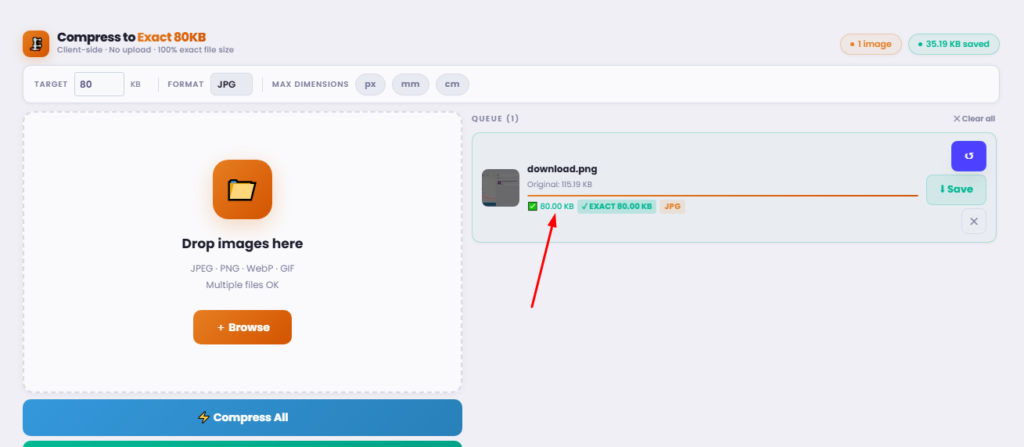
Sometimes, automated algorithms miss the mark. You might try to compress the photo to 80 KB, but the final output is 85 KB or 90 KB. When this happens, do not panic.
If you are struggling to compress a JPG to 80 kb perfectly, you simply need to make minor manual adjustments. Try reducing the physical width of the image by another 50 pixels, or nudge the image quality slider down by an additional 5%. Iterative testing is the key to successfully performing a conversion image to an 80 KB operation. Be patient, make minor tweaks, and re-download until the file properties show it is comfortably under the 80 KB threshold.
Advanced Tips: Batch Processing
What if you are a teacher, an HR administrator, or an event organizer who needs to process fifty photos at once? Resizing them one by one is a terrible waste of time. For this, you need a batch image resizing tutorial approach.
Many advanced online tools and desktop applications (like IrfanView or bulk online resizers) allow you to upload an entire folder of images at once. You can set a universal rule—for instance, instructing the software to convert images to 80kb and save as JPG—and the program will process all of them simultaneously.
Quick Batch Tutorial:
- Gather all your high-resolution images into a single folder on your desktop.
- Open a batch-capable image editor or bulk web tool.
- Select all files and drag them into the upload queue.
- In the output settings, select “Resize by Percentage” (e.g., scale down to 30% of original size) or set a maximum file size limit (80 KB).
- Choose your output format (JPG) to ensure a uniform batch photo converts into 80 kb.
- Hit “Start” and let the software output the newly compressed files into a designated folder.
Summary
Navigating digital application portals does not have to be a headache. By understanding the mechanics behind the 80 kb photo size, you take control of your digital documents. Remember that balancing physical dimensions, picking the right file format, and using smart compression are the keys to success.
Next time an application form halts your progress with a file size error, you will know exactly what to do. You can confidently pull up a free online tool, execute a flawless compression image to 80kb command, and submit your application with a crisp, clear, and perfectly optimized photograph.