
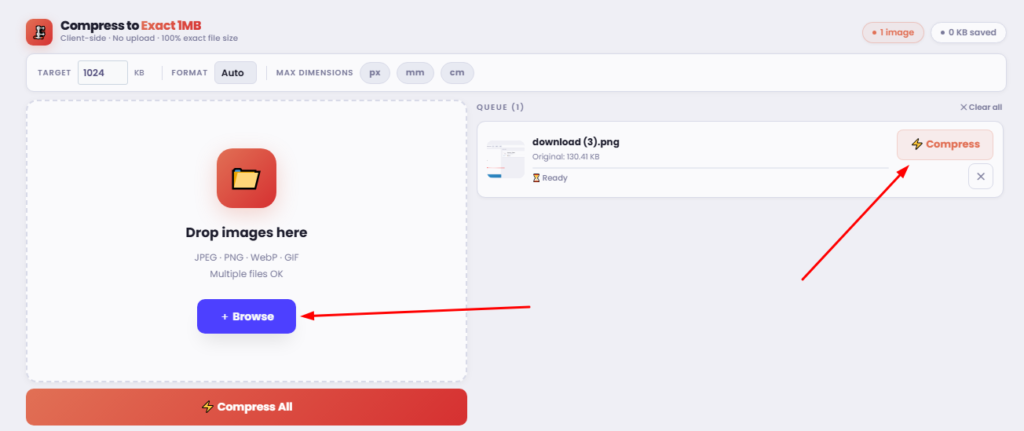
Multiple files OK
Add images using the panel on the left.
They'll appear here ready to compress.
Effective Techniques to Compress Image to 1MB
Compressing images to 1MB is crucial in today’s digital world. It ensures faster loading times and efficient storage management.
Whether you’re a photographer, web developer, or blogger, image compression can enhance your work. It helps maintain quality while reducing file size.
Various tools and techniques are available to achieve this balance. From online platforms to desktop software, options abound for every skill level.
Understanding the difference between lossless and lossy compression is key. This knowledge helps in choosing the right method for your needs.
In this guide, we’ll explore effective techniques to compress images to 1MB without losing quality.
Why Compress Images to 1MB?
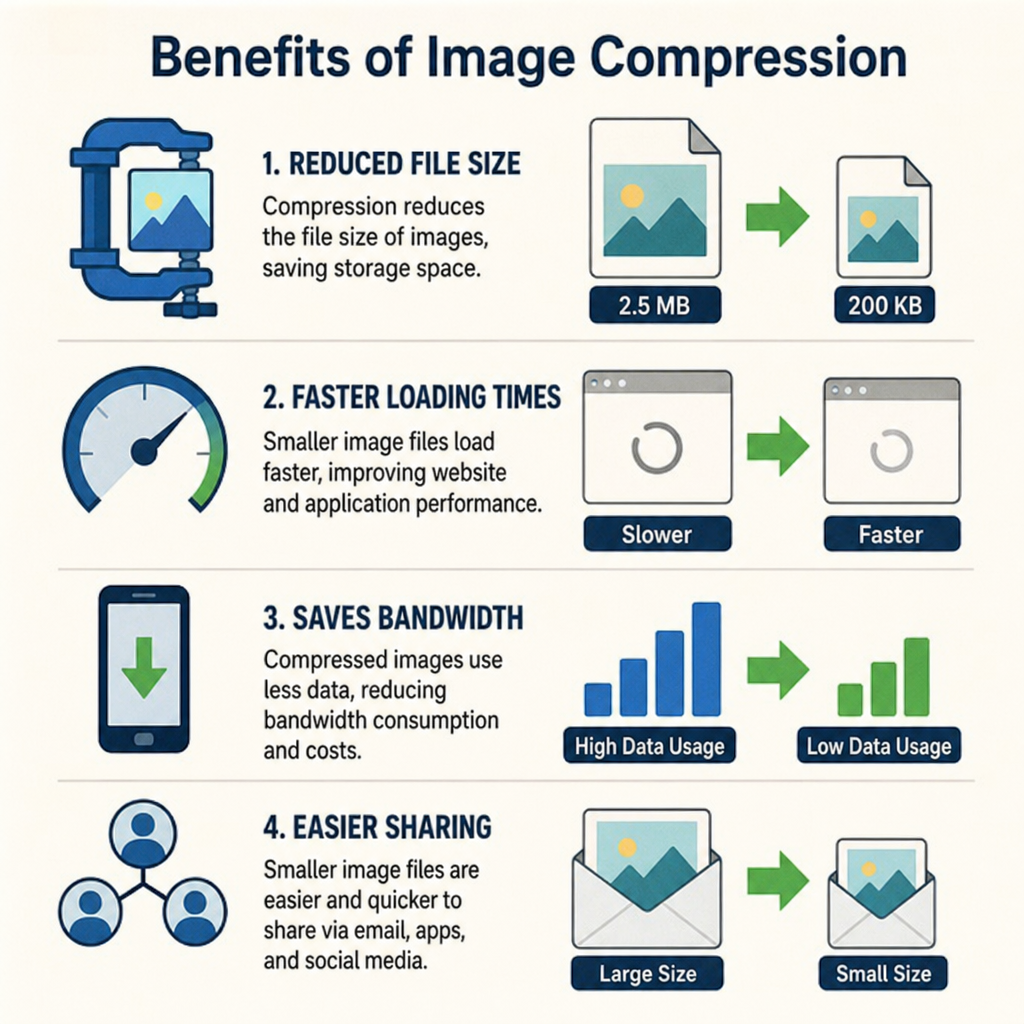
Compressing images to 1MB brings numerous benefits, especially for online content. Smaller images load faster, enhancing user experience and reducing bounce rates. This is crucial for website performance and search engine rankings.
Reduced file sizes contribute significantly to efficient digital storage management. With compressed images, you can store more files without the need for additional space. This is especially useful for photographers and businesses with large image databases.
For website owners, compressing images can save bandwidth. This is important for hosting costs and can result in significant savings over time. Mobile users also benefit as pages load more quickly with less data usage.
Here are some key benefits of compressing images to 1MB:
- Faster website loading times
- Efficient storage management
- Reduced bandwidth usage
- Improved search engine optimization
Being mindful of image sizes helps meet email attachment limits and ensures speedy deliveries. Image compression is not just about reducing size but also about maintaining quality for a seamless digital experience.
Understanding Image Compression: Lossless vs. Lossy
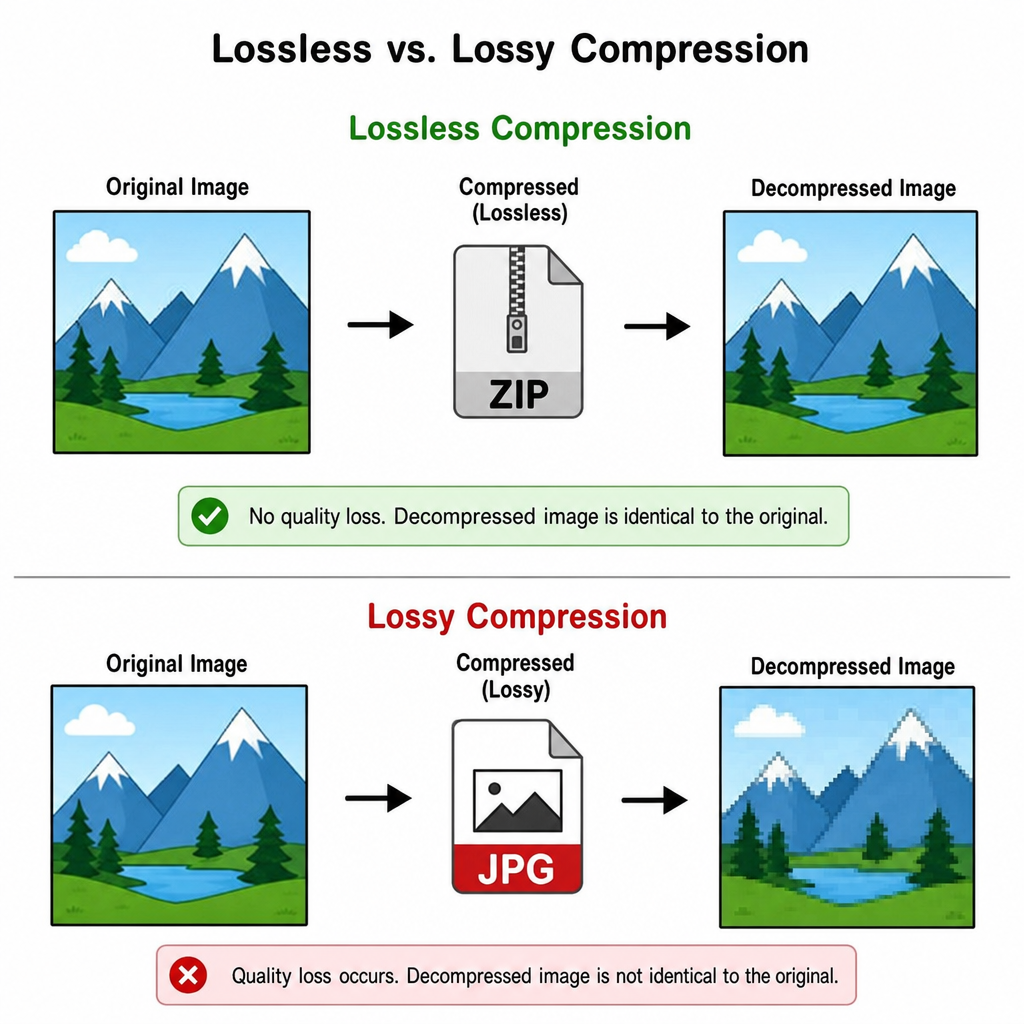
Image compression can be broadly classified into two types: lossless and lossy. Each serves a different purpose depending on the desired quality and file size. Understanding these can help you choose the best method for your needs.
Lossless compression reduces file size without sacrificing any image quality. It’s perfect when every bit of detail is necessary, such as in graphic design work. This method compresses by eliminating redundant data and preserving the original image data.
Lossy compression, on the other hand, reduces file size more significantly. It achieves this by permanently removing some image data, which may lead to a reduction in quality. However, the trade-off allows for smaller file sizes suitable for web use.
Consider these key differences when choosing compression:
- Lossless Compression: Preserves image quality, larger file size.
- Lossy Compression: Smaller file size, potential quality loss.
- Use Cases: Lossless for high-quality needs; lossy for efficient web use.
Choosing between lossless and lossy depends on your balance of quality versus size.
Choosing the Right File Format for Compression
Choosing the correct file format can significantly impact the effectiveness of your image compression. Each format has unique strengths and drawbacks that suit different needs.
JPEG is widely used for its excellent compression capabilities. It balances image quality and file size, making it ideal for photos and web use. However, repeated editing can degrade quality.
PNG offers lossless compression, maintaining image detail. It’s excellent for logos or images that require transparency but often results in larger files than JPEG.
Consider the following when selecting a format:
- JPEG: Optimal for photographs, compressed to small sizes.
- PNG: Retains detail and transparency but can be large.
- GIF: Limited colors, great for simple animations.
Selecting the right format is crucial for ensuring quality and efficiency.
Top Online Tools to Compress Image to 1MB
Online tools offer a convenient way to compress images to 1MB without installing any software. These tools are user-friendly and widely accessible, making them perfect for quick tasks.
One popular choice is TinyPNG. It uses smart lossy compression to reduce the file size dramatically. You simply drag and drop your images onto their website, and the process is automatic.
CompressJPEG is another excellent tool that specializes in reducing JPEG file sizes. It provides a straightforward interface and rapid compression, ideal for users with multiple photos to process.
Some key online tools include:
- TinyPNG: Excellent for PNGs and JPEGs, reduces file size with minimal quality loss.
- CompressJPEG: Focuses on JPEG compression with easy batch processing.
- OnlineConvert: Offers format conversions while compressing your images.
 by Eftakher Alam (https://unsplash.com/@easiblu)
These tools save time and effort, making them favored by photographers and designers. However, ensure a stable internet connection for the best results. Online options also provide flexibility for users across different devices and platforms, ensuring universal accessibility.
Using Desktop Software for Advanced Compression
For those seeking more control over image compression, desktop software is a great option. These programs offer advanced features that online tools may lack, such as granular quality adjustments and batch processing capabilities.
Adobe Photoshop is a powerful choice for professional-grade image compression. It allows you to fine-tune various settings like quality level and resolution, providing precise control over the output size and quality.
GIMP, a free alternative to Photoshop, also offers robust tools for compressing images. It supports batch processing, letting you handle multiple images simultaneously, which is a major time-saver.
Some noteworthy desktop software options include:
- Adobe Photoshop: A high-end tool with extensive features for image editing and compression.
- GIMP: Free and open-source, yet powerful, suitable for advanced compression needs.
- Lightroom: Streamlined interface tailored for photographers, offering quality control and efficient compression.
 by Kelsey Todd (https://unsplash.com/@sparkledump)
Using desktop software can enhance your digital asset management by enabling precise adjustments. The ability to work offline is an added benefit, ensuring access without internet dependency. Selecting the right software depends on your specific requirements and budget, balancing between cost and features.
Step-by-Step Guide: Compressing JPEG and JPG to 1MB
Compressing JPEG or JPG images to 1MB can seem daunting, but it’s easier with the right steps. Start by selecting a powerful image editing tool, such as Adobe Photoshop or GIMP, which provides detailed compression settings.
First, open your image in the software. Navigate to the ‘File’ menu and select ‘Save As’ or ‘Export’. This is where you’ll choose your compression settings.
In the export dialog box, adjust the quality slider. Lowering this setting reduces the file size. Aim to retain a balance between size and quality, and periodically check the file size indicator.
A useful approach involves resizing the image dimensions. Often, reducing the width and height can significantly decrease the file size without noticeable quality loss.
- Steps for compressing JPEG/JPG:
- Open the image in editing software.
- Select ‘Save As’ or ‘Export’.
- Adjust the quality slider for a smaller size.
- Optionally, resize image dimensions.
- Check file size and save when satisfied.
Finally, for web use, don’t forget to remove unnecessary metadata. This invisible data can bloat your file, and removing it helps achieve that 1MB target. Regularly practice these steps, and you’ll become adept at managing your images efficiently.
Batch Compression: Saving Time with Multiple Images
Handling numerous images often requires batch processing to save time and effort. Several tools allow you to compress multiple images at once, streamlining the workflow.
Batch compression tools, like FastStone Image Viewer and IrfanView, can help. These programs let you set desired file sizes for all selected images, ensuring uniformity in compression.
- Benefits of batch compression:
- Saves time with large photo collections.
- Ensures consistent file size across images.
- Minimizes manual repetitive tasks.
Efficient batch processing is especially useful for photographers and web developers managing hundreds of images. By automating the compression task, one can focus more on creativity and content production, rather than tedious manual adjustments.
Mobile Apps for On-the-Go Image Compression
For those who need to compress images on the move, mobile apps offer quick solutions. These apps are handy for instantly resizing photos to fit various needs.
Popular apps like Photo Compress 2.0, Resize Me!, and Image Compressor provide easy-to-use interfaces. They allow users to specify a target file size, such as 1MB, for their images.
- Advantages of mobile apps:
- Compress images directly on your phone.
- Convenient and user-friendly features.
- Supports popular image formats.
 by Faiz Rhm (https://unsplash.com/@faiz_rhm)
These apps enhance convenience by eliminating the need for transferring images to a desktop for compression. Whether you’re traveling or away from your desk, mobile apps offer a flexible solution to optimize your images efficiently.
Tips to Maintain Image Quality While Reducing Size
Maintaining image quality during compression is crucial. By following specific strategies, you can keep your images clear and crisp while reducing their size significantly.
Begin by selecting the proper file format. JPEG is often best for photos, while PNG suits graphics with transparency. Adjusting resolution and dimensions can further reduce the file size without much quality loss.
- Tips for preserving image quality:
- Use a lossless compression method when possible.
- Remove unnecessary metadata from images.
- Regularly compare original and compressed versions for quality assurance.
 by Annie Spratt (https://unsplash.com/@anniespratt)
Experimenting with different compression settings can help achieve the best balance between size and quality. By applying these tips, you’ll be able to efficiently compress images to 1MB while maintaining their visual appeal.
Frequently Asked Questions About Compressing Images to 1MB
When compressing images, you may have some common concerns and queries. Here, we address a few frequently asked questions about image compression to clarify the process.
Does compression affect image quality? Compression may slightly affect quality, especially in lossy methods. However, careful adjustments can minimize quality loss.
Which tools are best for compressing images to 1MB? Several tools, such as TinyPNG and CompressJPEG, are reliable for online compression. They offer efficiency and ease of use.
Is it possible to batch-compress images? Yes, many software options like Adobe Photoshop support batch processing. It saves time when dealing with multiple files.
- Additional FAQs:
- Can I compress images without software?
- How can I check an image’s current size?
- Are there free tools available for compression?
Conclusion: Best Practices for Image Compression
Compressing images to 1MB effectively requires the right balance of tools, techniques, and insights. By understanding the distinction between lossy and lossless compression, users can make informed decisions that suit their needs. Opting for the appropriate file format, whether JPEG for photos or PNG for graphics, is equally crucial.
Leveraging both online tools and desktop software can provide flexibility and precision. These tools offer versatile functionalities for both beginners and advanced users alike. Always maintain a careful eye on quality to ensure that compression does not diminish the visual appeal of your images.
Lastly, adopting regular compression habits can significantly enhance digital storage management. This practice not only benefits individuals in fields like photography and web development but also improves overall website performance and user experience.